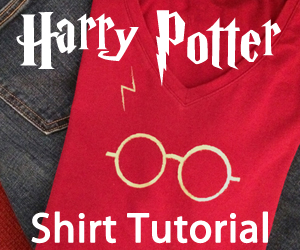
DIY: Harry Potter Shirt Tutorial
We have a fun Harry Potter inspired DIY for you today!
I’ve been looking for a fun Harry Potter t-shirt lately, and the ones I found online were great, but expensive, so I decided to make one myself. It’s cheaper, personalized just the way I want it, and it was fun to make.
I found this tutorial in my search for the right DIY, and I decided a freezer paper stencil was the perfect way to make my own t-shirt. I really love the design she did, but it seemed a little beyond my skill level (all those letters and small bits), so I decided to make my own design and go with a more minimalistic approach (it fits my style and it was easier for me to do). Do check out her tutorial; she has great tips.
I made a simple design for my shirt in Photoshop, but I’ve seen plenty of similar versions online. If you want to make your own shirt, you can always find one you like online and print it, or draw your own if you’re artistically talented! (I’m so not!)
Here’s what you’ll need to make your Harry Potter inspired t-shirt:
- T-shirt – I picked scarlet because that’s my “house” color! I washed my shirt before the project (that helps to prevent colors bleeding onto your design).
- A design – If printing from a website, make sure you have permission to use the image; please don’t take anyone’s art without asking, and make sure not to violate HP copyright.
- Fabric paint and paintbrush– I chose a gold metallic shade, again to match my house colors. Make sure you pick a permanent paint made for fabrics.
- Freezer paper – This will be your stencil. Make sure you get the kind with plastic coating on one side. You cannot substitute wax paper or parchment paper here; freezer paper is a must.
- X-ACTO knife – It goes without saying that these are very sharp, so please be careful and make sure children do not attempt this without adult supervision.
- Cutting mat or chopping board
- Pair of scissors, ruler, tape, and an iron
You’re now only 5 easy steps away from an awesome, personalized shirt. Let’s get started!
Step 1:
First things first – pick a design. As I mentioned earlier, if you find one you like online, you can simply print that design straight onto your freezer paper. Since I made my design on my computer, this is the transfer method I chose. I just used a ruler to cut an 8.5” x 11” sheet of freezer paper and fed it straight into my printer.
If you’d rather draw your own design by hand, you can do that too! You could draw it straight onto your freezer paper, but I would suggest drawing on a regular sheet of paper and going over it with a Sharpie to make sure the lines are bold. Then place your freezer paper (dull side up) on top and simply trace your design onto the freezer paper.
Important: freezer paper has a shiny side and a dull side. You want to make sure you’re printing or drawing on the dull side.
Step 2:
Place your printed freezer paper on a cutting mat or chopping board, dull side up. You can use small pieces of tape to secure your paper to the board, which will help it stay in place while you cut. Using an X-ACTO knife, cut out your design. As someone who failed cutting in kindergarten (yes, really), I can tell you that this was the hardest part for me. I actually had to do this twice; practice makes perfect!
Important: remember that you’re turning your design into a stencil, so if you have any “inside” parts (in my case, the inner circles of the glasses), you need to cut those carefully and save them. You’ll be using them later.
Step 3:
After you have your design cut out, you now have a stencil! You’ll take this stencil and lay it on your shirt, shiny side down. Using a hot iron, go over the paper and allow it to “adhere” to your shirt. It will peel off easily with no residue. Make sure all your edges, inner and outer, are sealed to the fabric, because that keeps the paint from bleeding outside the lines. If you have bits like the circles of the glasses, add those after ironing on the bigger stencil.
Step 4:
When your stencil is nicely sealed onto the shirt, it’s time to paint! First put a piece of cardboard (or anything flat and solid that you don’t mind getting a little paint on) inside your shirt; this will prevent the paint from bleeding through onto the back of your shirt. Then just add a dab of paint to your brush and start carefully filing in the blank spots.
Step 5:
When you’re finished painting, you need to wait for the paint to dry a bit before peeling off the stencil (you don’t want to smear the paint). After that, follow the directions on your paint bottle; mine said to let dry for 72 hours and then wash before wearing.
And that’s it! Before I wash and wear, I’ll carefully go back over the design with a tiny paintbrush to fill in and even out some spots.
For aftercare, I’ll probably always wash this shirt inside-out in cold water and let it air dry; I find that’s a good way to keep prints on shirts, especially handmade ones, from fading too quickly. Of course if you iron your shirt, turn it inside out or place some other fabric over the painted design beforehand.
Now that I’ve seen how easy it is to do a freezer paper stencil, I have a feeling I’ll be making more of these! And the entire project is cheap – you probably have many of the things you need on-hand already, and the rest is inexpensive. I spent about $10: the shirt was $4.94 (regular price!) at Walmart, the paint was $2.99 after a coupon at a craft store, and the freezer paper was about $2.00 at a local grocer.
Are you going to make your own freezer paper stencil shirts? If so, tell us what you make or leave us a link to a picture. We’d love to see what you do!


-11 Comments-
I’m about to try to make shirts for Disney with freezer paper stencils. Your highly detailed tutorial will really help me with those.
Maggie recently posted..The Stolen Twin by Michele Pariza Wacek (Giveaway ends 7/27, open WW)
This is so cute! My kids are just starting to read Harry Potter! They would love to make these shirts!
Leah recently posted..Celebrating Life’s Miracles
I love this! My daughter just started reading the first book and it is instant love for her. This would be fun for her to make with her new obsession. Such a cute and simple idea!
Emily recently posted..DIY fire pit for the backyard
How cute! My kids were both huge fans of Harry Potter!
Ellen Christian recently posted..How to Choose the Best Hardwood Kitchen Table Set
What a fun project! I have never used freezer paper stencils before but your tutorial makes it all look really do-able. Thank you for sharing!
April J Harris recently posted..Nigella’s Italian Breakfast Banana Bread
Ha, that is a fun shirt! It turned out just perfect. Nice job on the placement.
I love Harry Potter so anything HP related is wonderful. This is a really cute shirt! It doesn’t seem TOO difficult to make either, which is good for me. haha I love crafts and DIY but I’m not always the best at it.
-Lauren
ShootingStarsMag recently posted..If You Were Me and Lived In…Elizabethan England + Giveaway
LOVE x a gazillion! So simple yet stylish. Thanks for sharing this!
Jess Benoit recently posted..Cool Off This Summer With Community Iced Coffee | #CommunityCoffee
Omgosh this is so neat!! I love it!! So easy and I could really do any design! Not that Harry Potter isn’t amazing 😉
What a cute shirt! These would make great gifts or birthday party sleepover art projects!
I love DIY projects. this is adorable